There is a very good reason why my 'leftover turkey' post does not have a finished product picture. And I'd like to share that reason with you.
Yes. There was a cowboy that snuck into my fridge, and decided that the enchiladas that were so nicely rolled, and neatly side by side, needed to be tasted. Right now.
I still cooked them, and we still ate them...but believe me. It wasn't aesthetically pleasing. :) (although they tasted GREAT!)
Thursday, December 2, 2010
Saturday, November 27, 2010
Leftover Turkey Enchiladas
I originally planned on doing a post for all my Thanksgiving dishes, but, as it is now several days after, I really, really just want to get to the leftovers. *slacker*
I love leftovers. Love eating them (provided its good leftovers) for a few days. Even more, though, I love coming up with something new to do with the leftovers. So today, I'm tackling turkey.
A confession: I don't love turkey. I'll eat it on holidays, but, for the most part, I'll eat a small piece, and focus more on the side dishes...cuz that's the kind of gal I am. So the plate of turkey sitting in my fridge? Yeah, probably just gonna sit there unless I figure out something to do with it.
I didn't want to do a casserole...I love me some casseroles, but a turkey casserole didn't seem overly appetizing. So I decided to make some enchiladas!
Leftover Turkey Enchiladas
2 cups shredded turkey (white or dark meat, your preference)
8 green onions, chopped
1 tablespoon chili powder*
1/4 teaspoon garlic powder*
1/4 teaspoon onion powder*
1/4 teaspoon crushed red pepper flakes*
1/4 teaspoon dried oregano*
1/2 teaspoon paprika*
1 1/2 teaspoons ground cumin*
1 teaspoon sea salt*
1 teaspoon black pepper*
*you could use a packet of taco seasoning here, with the same results)
1 T butter
1 T vegetable oil
1/4 C chicken broth
1 C sour cream
1 C cottage cheese
8-10 flour tortillas
Cheese, optional
Red enchilada sauce (a 10-oz can, or make your own. Recipe here)
Saute turkey, onion, and spices in butter and oil. Add chicken broth. Cook til broth cooks down.
Mix sour cream and cottage cheese together in a bowl, along with some salt and pepper. Or lots of pepper. :)
Take a tortilla, and put about 3 T of the meat inside...
...followed by some of the cottage cheese mixture. (Some Monterrey jack cheese would be amazing here, but, as it is a leftover dish, I didn't see the need to run to the store for any. Instead, I just used the leftover Colby cheese from my cheese and cracker tray.)
Roll up tortillas and place in lightly greased baking dish. Repeat until all of your mixture is used up. Top with red enchilada sauce and bake at 350 degrees for 30 minutes. Enjoy!
Friday, November 26, 2010
Firsts
**I'm probably going to be posting tons of new posts today...you have been warned.**
I love to try new recipes. Holidays give me the perfect excuse, too. (Not that I really need an excuse, I usually just do it anyways.)
This year has been a year of many first for me. Almost one year ago, was my sons first birthday. That sort of started it off. It was the start of the Christmas season, which held many, many firsts.
1. My first time taking a road trip with my hubby. (Not too many road trip destinations available when you live on Oahu.)
2. My first time in Texas. (Sorry, all you Texans...but I'm not real anxious to return. *insert plea to Uncle Sam* PLEASE anywhere but Fort Hood...)
3. My first time taking a road trip...or going anywhere, really, in a wrecked car. (Don't ask. And even if you do, all I'll say is it was NOT my fault...and if you're ever had to climb into the passenger seat of a car OVER the gear shifter thingy, you know that it is very painful and humiliating to recall how many times your big ol' butt was thrust up in the air as you climb into the car head first... you wont begrudge me my silence on this subject.)
4. My first time meeting my hubby's older brother.
There are many other firsts, but I want to get to the food. Last Christmas, there in that bleak, bleak, state of Texas, my wonderful sister-in-law and I made Christmas dinner for our families. She, being a holiday meal veteran, handled the ham, and I, being a rookie, made a few sides.
-Green bean casserole: a wonderful recipe that is oh-so-tasty and does not include cream of mushroom soup.
-Sweet potato casserole: made with the taters mashed. Yum.
-Sweet potato stuffed apples: this was a newbie. The one recipe I tried that I had never tried before. It was super easy and delish!
-Mini cheesecakes: ok, so its not a side...but it should be!
-Cheeseball: my families secret-but not secret recipe. Its super easy. Every one knows how to make it. But it still has that...secret feel to it.
I carried a few of these recipes with me all the way to yesterday's turkey day. But, of course, I had many firsts yesterday as well.
-My first time making a turkey: Brine it, folks!
-My first time actually hosting a holiday dinner: sure to not be my last.
-New recipes? Check!
-Stuffing, made with Chorizo, pecans and cheddar cheese. A repeat? Definitely.
-A certain roll recipe: A repeat?...maybe. I'm sure it would have been better had I read the ENTIRE recipe all the way through...then I would have known that it was going to take 15 HOURS to make these puppies. They sure did taste good though!
-Pumpkin Pie: I don't think I'll ever go back to canned pumpkin again.
-Pecan Pie: note to self-make sure you pay attention while toasting pecans. They burn. Easily.
These are a few of the things I made, and I'll be posting about them here pretty shortly. My goal is to do it today, but it may not happen. They will be posted though!
Cheers!
Liz
My Tornado
I have lots of things I wanted to put up here today.
Recipes for some yummmmmy Thanksgiving food.
My two newest cookbook additions, that I received as gifts for my birthday which was...uhm...well, about 2 months ago. Yeah, I know. I've been slacking.
A list of what I'm thankful for.
And lotsa more things. But, today, on this Black Friday day...here in SNOWY Kentucky, (helllloooo winter!) as I listen to my little cowboy in the other room, doing everything in his power to NOT take a nap...I just want to share this:
This was my Tornado about one year ago...When he wasn't quite so...Tornado-ish.
And this...this is him about 3 weeks ago. It's probably one of my most favoritest pictures of him I've taken. He looks JUST like he is. Happy. Mischievous. Smart. Oh, is he smart. 100% boy. He's my little Tornado. My cowboy. And today, the day after Thanksgiving, he is on my mind. Why? Because he's almost TWO!
That's right. In T-three days, my little man will be two. Just thought you'd want to know. :)
Liz
Sunday, October 10, 2010
Slow Cooker Taco Soup
I've never made taco soup before but had heard many, many good things about it. And today...well it felt like a taco soup kind of day. (I forgot to take pictures of the ingredients...sorry!)
1 1/2 lb ground beef (I used 93/7)
1/2 C onion, chopped
3 green onions, chopped
2 T cumin
1 T chili powder
1 t salt
1 t pepper
1 t oregano
1 t paprika
1 t garlic powder
1 t onion powder
1 (12 oz) beer
1 (10.75 oz) can tomato soup
1 (10 oz) can diced tomatoes with chiles (Rotel)
1 (15 oz) can black beans, drained
1 (15 oz) can corn
1 (14.5 oz) can whole tomatoes, for the hubby
To serve (optional):
Sour Cream
Shredded cheese
Tortilla chips
Green onions
Brown the ground beef, onions, and seasonings in your slow-cooker. You could do this in a pan on the stove and transfer it. Either way is fine. Add your tomatoes, corn, soup, beans and beer. Cook on HIGH for 4 hours, or low for 8 hours.
Thursday, September 30, 2010
Spaghetti and Meatballs
I'm not a huge pasta fan. Really. Mac and cheese is about the most noodle I can handle. Growing up, I was the oddity in my pasta salad loving family. I loathed the times we would go to relatives homes and they'd have spaghetti for a meal. Because I'd have to eat it. Can't be rude.
I used to long for the day when I'd be out on my own (ok, so I never got that far. Got married instead) and I'd be pasta free!
For the first year or so of our marriage, the hubby would ask for spaghetti from time to time. I'd heave a sigh. Maybe pout a little. Maybe. Then I'd make it, with the cheapest sauce I could find. And with very little grace.
I have recently come to realize that...I will probably never love spaghetti. But I can cook it for my family and enjoy making it to be as tasty as it possibly can get. And that is today's mission.
Sauce
Recipe and photos by Busy Nothings
1 (28 oz) can crushed tomatoes
1 (6 0z) can tomato paste
1/2 C onion, diced
2 T dried basil
2 T dried oregano
2 T dried parsley flakes
2 T garlic powder
1 t sugar
1 bay leaf
dash red pepper flakes
salt and pepper to taste
Saute the onion in...BACON GREASE! Haha. Or olive oil, if you didn't happen to have bacon for breakfast this morning like I did. In a medium sauce pan, put the tomatoes and the paste in, then add all of the seasonings. Once the onions are tender, add those as well. Simmer for three hours on low.
I pretty much just read a bajillion sauce recipes and came up with my own based on what I had in my pantry. Should be good!
Meatballs
Recipe and photos by Busy Nothings
Origianl recipe by For the Love of Cooking
1 lb ground beef
1/4 C onion, finely chopped
1/4 C Italian style breadcrumbs
2 T parmesan cheese
1 clove garlic, minced
1 egg
1 T dried basil
2 T parsley flakes
1/4 C shredded mozzerella cheese
2 dashes Worcestershire sauce
Sea salt and cracked black pepper, to taste
1 T olive oil
Mix everything together. Roll into balls. Heat olive oil over meadium heat in a skillet. Cook meatballs in oil until golden brown on all sides. Put meatballs in sauce and simmer for 30 minutes.
Tuesday, September 28, 2010
Tomato Basil Soup
This soup is amazing.
It shouldn't be. The adage "Simplest is Best" rarely applies to cooking. Simple recipes tend to become complex when I'm around as I try and season them up...change this and that. But this. This.
A six ingredient soup that is almost to die for? Yep. It's for real.
It's so easy that it feels like you have to be missing something. I probably looked at the recipe at least two dozen times just to be sure that I hadn't left something (or several somethings) out.
Tomato Basil Soup
Recipe and photos by Busy Nothings. Original recipe on Allrecipes
3 (28 oz) cans crushed tomatoes
2 3/4 C chicken broth
1/8 C dried basil
3 T sugar
1 1/2 C heavy whipping cream
2/3 C butter
In a large saucepan, bring the tomatoes and the chicken broth to a boil. Reduce heat, cover and simmer for 10 minutes. Add basil and sugar. Reduce heat to low and stir in whipping cream* and butter. Cook until the butter is melted. Serve with crusty rolls and ENJOY!
*I added the cream veeeeerrry slowly, especially at first to avoid curdling. Turns out I didn't have a problem with it at all. But please do NOT boil the soup once the cream has been added as it will more than likely curdle...which is no fun.
Thursday, September 23, 2010
CHOCOLATEchocolate Cake
This year I decided to make myself a birthday cake. I hadn't planned on it. But on my birthday, I woke up and wanted a cake. A chocolate cake. A BIG chocolate cake.
So, I stuck my son in his highchair for breakfast and began the search.
Didn't take me too long...I already knew what frosting I would be using. I came across the recipe on Our Best Bites a while back and have been looking for an excuse-er...reason...to use it ever since.
The cake recipe came from the ever wonderful Allrecipes. I quickly got to work.
Chocolate Cake
Recipe and photos by Busy Nothings
Original recipe from Allrecipes.com
2 1/4 cups all-purpose flour
2 teaspoons baking soda
1/2 teaspoon salt
1/2 cup butter
1 1/4 C brown sugar
1 1/4 C granulated sugar
3 eggs
1 1/2 teaspoons vanilla extract
3 (1 ounce) squares unsweetened chocolate, melted
1 cup sour cream
1 cup boiling water
Preheat oven to 350 degrees. Sift together the flour, baking soda and salt. Set aside.
In a large bowl, beat 1/2 cup butter or margarine and sugars until well mixed. Add eggs one at a time. Beat in the vanilla and melted chocolate squares. Add 1/2 the sour cream and then 1/2 the dry ingredients to the butter mixture until well blended.
Add the remaining sour cream and dry ingredients to the batter. Stir in boiling water.
Bake in two 8-inch round greased pans for 25-35 minutes or until toothpick inserted in center of the cake comes out clean.
Chocolate Frosting
Recipe from Our Best Bites Photos by Busy Nothings.
2/3 cup granulated sugar
1/3 cup all-purpose flour
3 tablespoons unsweetened cocoa powder
1 cup milk
1 cup real butter, softened
1 cup semi-sweet chocolate chips, melted
Optional: Additional cocoa powder as needed
Melt your chocolate chips if you haven't already and set aside to cool. You obviously don't want it so cool that it hardens, but you can get it close to room temperature and still have it be soft and stir-able.
In a small saucepan, whisk together sugar, flour, cocoa, and milk; bring to a boil, whisking frequently. Boil 1-3 minutes or until thickened like a thinned pudding. Remove pan from heat and strain mixture into a small bowl. Cool completely in the refrigerator or freezer.
When chocolate flour mixture is cooled, beat the butter until creamy, about 1 minute. Beat in the cooled chocolate mixture until well combined fluffy, about 1 minute. Finally add in melted chocolate and beat again until well combined and fluffy, about 2 minutes. If desired, add additional cocoa powder to taste, up to 4 tablespoons more. Spread or pipe frosting on to cupcakes or cake.
**I doubled the frosting recipe so I'd have enough to frost and fill a double layered cake.
Once cake is completely cool, level out the layers so they are even using either a cake leveler or a knife if you are brave.
Put frosting over the bottom layer and top with second layer.
Frost the top and sides of cake and...
ENJOY...cuz its good.
Wednesday, September 22, 2010
Slow-Roasted Lime Cilantro chicken
I'm excited. Very excited. I have opened up a whole new world for myself. What is that world? Chicken. Whole chicken. It's amazing. It's easy. They are relatively cheap. I love it.
While grocery shopping earlier this week, I stood in indecision staring at the whole chickens. I had never (ever) cooked one before. Ever. And I was, not gonna lie, slightly scared of it. It always seemed like they would be so difficult to cook, turning out either not done enough, or so dry you need to drink a gallon of water just to eat dinner.
However, swallowing down my fears, I grabbed one, stuck it in the cart and turned and walked away as fast as I could, in order to prevent putting it back. I was that scared.**Sarah...I now believe I know how you feel when faced with baking.**
I had come across this recipe for a slow roasted chicken at For the Love of Cooking and it looked so delectably delicious that I just knew I'd have to try it.
Slow Roasted Lime-Cilantro Chicken
Recipe and photos by Busy Nothings. Original recipe by For the Love of Cooking.
5 lb free range chicken
1-2 tbsp butter softened
2 tbsp fresh cilantro, chopped
1 lime, zest and juice
1 tbsp garlic powder (got to get some fresh asap!)
1/2 a sweet yellow onion quartered
Handful of cilantro including stems for stuffing
Sea salt and fresh cracked pepper, to taste
Preheat oven to 275 degrees. Wash the chicken and pat dry. Mix the cilantro, lime zest and garlic powder with the softened butter. Place the chicken on a roasting rack and rub some of the butter mixture over the back of the chicken. Cut the lime in half and squeeze half of it over the back of the chicken, then salt and pepper it to taste. Flip over the bird so it is breast side up, and carefully (very carefully) lift the skin over the breast and rub some butter mixture directly onto the breast meat. Rub remaining mixture over the rest of the skin of the bird. Squeeze the second lime half over the top of the bird and salt and pepper to taste. Stuff the lime halves, the onion, and the cilantro into the cavity. (If you have fresh garlic, toss some garlic cloves in there as well...).
Place a meat thermometer into the thickest part of the thigh, making sure not to touch the bone. Roast uncovered for 3 1/2-4 hours until the meat thermometer reaches 180 degrees. Let the bird sit for at LEAST 10 minutes before cutting.
Delicious! I can't wait to try this with other seasonings.
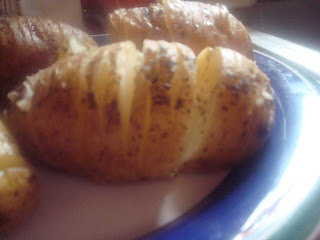
Hasselback Potatoes
We had some friends over for dinner the other night and I wanted to try something new. Something other than mashed potatoes. Not that I'm sick of them or anything.
Anyways. While perusing some of my favorite food blogs, I had come across these yummy looking spuds and decided that tonight would be the night! I made a few changes according to what I had (or rather, didn't have) in my kitchen.
Hasselback Potatoes
Recipe and photos by Busy Nothings. Original recipe at For the Love of Cooking.
4 medium baking potatoes
Olive oil
Sea salt and cracked black pepper, to taste
Dried basil, to taste
Garlic powder*, to taste
Preheat your oven to 425 degrees. While its warming up, wash your potatoes very well and slice thinly, being careful to not cut all the way through. (Use a large spoon to hold the potato to ensure you don't slice all the way through, if you need it). Season each potato with salt, pepper, basil and garlic powder to taste. Drizzle with olive oil and wrap in foil. Bake for one hour, or until potato is tender. Serve with butter and sour cream if desired.
I didn't even think of it at the time, but these would be so easy to make on the grill also. Just place on hot grill and cook until tender. Yum!
*Original recipe calls for thinly sliced garlic placed between each potato slice. As I didn't have any fresh garlic(hard to believe) I used garlic powder. I can't wait to try these with fresh garlic!
Sunday, September 19, 2010
Leftover Mashed Potatoes
If you are even remotely like me, when you make mashed potatoes you make a lot. A lot. Like 5 lbs for two adults a lot.
I can't help it. I've tried! I just start peeling potatoes and plopping them in the water and I think...'that doesn't look like enough...neither does that...hmm...' and before I know it i have a pot full of potatoes and an empty potato bag. And a huge smile on my face. Because, quite simply, I love potatoes. In any way, shape, or form.
There. I've confessed.
Anyway, if you are like me and always end up with leftover potatoes then you know that they will probably sit in the fridge for a while. Because, as much as I love them...they don't get eaten as often as I'd like once they've been refrigerated.
The solution? Potato pancakes. Mashed Potato pancakes.
Now, I don't have any measurements to put up here because this is one of my 'just throw it together' recipes. So you'll have to eyeball it. Sorry.
Just take your bowl of leftover potatoes and add an egg. Sometimes I use two, if I have a lot of potatoes. Add some flour. Parmesan cheese. Some salt. The rest is up to you.
Take a shallow bowl or a plate and put a bunch of parmesan cheese and some flour on it (I also added a few shakes of cumin this time.). Grab a small handful of the potato mixture and roll it in the flour/parmesan cheese mixture. Press to form patties and place on a cast iron skillet with some oil until browned on both sides.
Now, for this particular batch I've just finished making, I had some leftover taco meat that I wanted to use up. So I stirred that into the potato/egg/parm mixture.*
I know this is such a stinky recipe. No measurements. No nothing. But the result? A crispy on the outside (thanks to the parm) and hot soft potato on the inside. It's to die for, I'm telling you.
*Normally I don't have the leftover meat to add. Usually I add some Italian breadcrumbs to the potato mix and some Italian seasoning. Its sooo good! The meat is just an added bonus this time;)
Sunday, September 12, 2010
Sour Cream and Dill Potato Salad
The thing I love the most about this potato salad is that its different. There is no mustard in it.* Not one little bit. Plus, its sour cream. And dill. In other words, its perfection.
Last week I was out with a friend and she was talking about planning her daughters birthday party. During the conversation she mourned the fact that, as she doesn't eat potato salad, she doesn't really know how to make it. Cue Liz.
So I volunteered. And while I was making this batch, I boiled pretty much every potato in my house and made approx. 8 lbs of potato salad. Half for the birthday party, half for a pot luck meeting I am going to have tomorrow.
Now, potato salad is really easy to make. The only reason I don't make it more often is that it really is sort of time consuming. I mean, you (sometimes) peel, you boil...then you have to chill it...so even though its a very easy process, if you don't have the time to wait on a pot of water and fridge time...
But in the end its so worth it.
This recipe is one I found in one of my favorite cookbooks ever, a Best of Southern Living cookbook. My mom has used this cookbook for years, and when I got married she went and bought me a copy. I had never tasted it before I got married however. My mom always just makes an old family recipe for potato salad...plus my dad refuses to eat anything that has sour cream in it. His loss. :)
Sour Cream and Dill Potato Salad
(Photos and recipe by Busy Nothings. Original recipe: Southern Living)
3 lbs new red potatoes(you know...the little ones)
2/3 C. mayo
1 (8-oz) container sour cream(I usually end up using a little bit more...I love my sour cream!)
2 T parsley
3 T dill
1 1/2 t. salt
1/2 t. pepper
Cut new potatoes in half or in quarters, depending on how you like it. Boil in water until soft. Drain and move potatoes to large bowl. Add mayo, sour cream, and seasonings. Mix well. Refrigerate 4-6 hours, or overnight. And enjoy the BEST potato salad ever. Really.
*I'm not hating on mustard potato salad. Really. I like it, I do. But...this is sour cream. And dill. Isn't that explanation enough?
Labels:
cooking,
potato,
potato salad,
Southern Living
Friday, September 10, 2010
Hearty Chili
It's kind of a 'blah' day today...The perfect day for some homemade chili.
Now, I think everyone who makes chili has a tried and true recipe. The one they grew up eating, the one that has been handed down. And don't get me wrong, I have one like that too. Its delicious. It makes me think of home and cold winter days. But when I opened my freezer and saw that I only had one pound of ground beef...and a whole bunch of ground venison, I decided to scour the net and find something new to try.
I found a ton of recipes and after reading all of them and looking through my cabinets I decided to just sort of...well combine a few of them. What I ended up with and is now simmering on my stove smelling delicious is what I'm going to call 'Hearty Chili'.
Hearty Chili
(Recipe and photos by Busy Nothings)
1 lb ground beef
1 1/2 lbs ground venison
1 onion, chopped
4 cloves of garlic, minced
1 (28-oz) can whole tomatoes
1 (28-oz) can diced tomatoes (I used the can with the Italian herbs in it)
1 (6-oz) can tomato paste
1/4 C chili powder
3 T. cumin
1 1/2 t. garlic powder
1 1/2 t. onion powder
3 green onions, chopped
1 green bell pepper, chopped
1 (12-oz) lager style beer (I used Killians)
1 lb BACON! (Told you it was hearty!)
3 cans dark red kidney beans.
salt and pepper to taste
Brown the ground meat with the onion and garlic. Add the tomatoes and stir. Add all the spices and the green onion, bell pepper and beer. Stir. Cook bacon in a skillet and crumble. Add to the chili. About 30-45 min before serving add the kidney beans. Salt and pepper to taste!
One of the things I like best about chili? Its insanely forgiving. Don't have a whole onion? No problem. Want to change up some seasonings? It'll still be fine. It's one of the easiest, tastiest things you can make.
I like to serve mine with some corn chips (like Fritos) cheddar cheese and sour cream. DELICIOUS!
Pizza again!
Thursday, September 9, 2010
Banana-Coconut Bread
When I woke up this morning and walked into the kitchen, the first thing I saw was the three very ripe bananas sitting on my microwave. And then I thought banana bread! I normally don't have bananas that are ripe enough to make bread with. They don't last that long. My son loves his 'naners'.
So once my errands were done for the day I got to work.
I found this recipe on For the Love of Cooking a while back and its been festering in the back of my mind ever since. I love banana and coconut together! The original recipe makes muffins but I adapted it to make a loaf.
It's baking right now as I type this and my kitchen smells wonderful. The cinnamon smell is mouthwatering.
Banana Coconut Bread
Adapted recipe and photos by BusyNothings.
Original recipe found on For the Love of Cooking
1 1/2 cups of flour
3/4 tsp baking soda
1/2 tsp salt
1 1/2 tsp cinnamon
3/4 stick of butter (6 tbsp) melted
1 1/2 tsp vanilla extract
2/3 cups of sugar
1 large egg
2 large very ripe bananas
3/4 cup shredded coconut plus more for sprinkling on top.
Preheat oven to 350 degrees. Coat loaf pan with cooking spray.
In a small mixing bowl combine first four ingredients. In another, larger bowl, whisk together vanilla, sugar and egg. Add melted butter to sugar and egg mixture and mix well. Smash the bananas and add to the batter as well as the coconut until well combined. Add the dry mixture to the wet mixture and mix until ingredients are just comibined. Don't over mix the batter. Pour batter into loaf pan and sprinkle some coconut on top.
Bake in preheated oven for 30-40 minutes or until tester inserted in the middle of the loaf comes out clean.
Note: Since this recipe was adapted from a muffin recipe, the loaf won't be very tall. Next time I'll be making them as muffins.
Wednesday, September 8, 2010
An omelet experiment
I was reading over on Our Best Bites and checking out all their wonderful recipes. Being very new to the food blogging world, I only recently discovered their blog but it has quickly become one of my favorites. My favorite thing about it? How real these women are. There is no pretense.
Another thing I love? How they use real ingredients. There's no...wheat germ or gluten-free stuff.* Or splenda. Or margarine. Two real women using real ingredients that you don't have to go out and scour every single one of your local grocery stores to find.
Anyway back to my experiment. If you read a few posts back I made omelets for breakfast. Ham, cheese and green onion omelets. Well I made another one for my lunch today. What can I say. I like omelets!
I was browsing through Our Best Bites and found this recipe for Baked Breakfast Taquitos. And it gave me an idea.
Now I like to cook, but I've never really experimented with different ingredients. I pretty much see a recipe and make it, sometimes adjusting it to our personal tastes. So when I read the section about scrambling the sour cream right into the eggs I went 'I need to try that!'
So today, with my son watching Shrek in the other room quietly, I decided I'd try it in an omelet.
So two eggs and about 2 Tablespoons of sour cream and a little salt and pepper went into the pan. It wasn't as...fluffy, I guess. It seemed flatter. But it smelled great.
Once it was done I flipped it in half and slid it onto my plate. And tasted it. WOW! Was it as fluffy as my normal egg and milk omelet? No. But the taste was amazing. It was rich and...rich...ok it was really really good. I can't wait to try this with actual scrambled eggs, because I'm sure that the cooking method has something to do with it. I'm sure they'll be light and fluffy and tasty.
*I'm not dissing cooking like this. Not at all! I have several friends with food allergies so I know that sometimes people need to cook gluten-free etc. But for those of us who aren't it sure gets frustrating to not be able to find ingredients like this when we don't have the need for them.
Sunday, September 5, 2010
Southwestern Pizza
Sunday night dinner? Southwestern PIZZA!
I fully intended to make BLT's. Honest. But I had one leftover chicken breast...and some green onion...and black olives...and next thing I knew I was getting out the pizza dough recipe.
I've only made homemade pizza a handful of times. This is something that I sincerely want to remedy. The three of us looooove pizza and its really not that difficult to make.
My crust recipe came from Allrecipes and I followed it to a T.
Pizza Crust
2 1/4 teaspoons active dry yeast
1/2 teaspoon brown sugar
1 1/2 cups warm water (110 degrees F/45 degrees C)
1 teaspoon salt
2 tablespoons olive oil
3 1/3 cups all-purpose flour
In a large bowl, dissolve the yeast and brown sugar in the water, and let sit for 10 minutes.
Stir the salt and oil into the yeast solution. Mix in 2 1/2 cups of the flour.
Turn dough out onto a clean, well floured surface, and knead in more flour until the dough is no longer sticky. Place the dough into a well oiled bowl, and cover with a cloth. Let the dough rise until double; this should take about 1 hour. Punch down the dough, and form a tight ball. Allow the dough to relax for a minute before rolling out. Use for your favorite pizza recipe.
Preheat oven to 425 degrees F (220 degrees C). If you are baking the dough on a pizza stone, you may place your toppings on the dough, and bake immediately. If you are baking your pizza in a pan, lightly oil the pan, and let the dough rise for 15 or 20 minutes before topping and baking it.
Bake pizza in preheated oven, until the cheese and crust are golden brown, about 15 to 20 minutes.
**Thank you Jay from allrecipes.com!
The original sauce recipe also came from Allrecipes
Pizza Sauce
(modified recipe by me! Original recipe from allrecipes)
1 (6 ounce) can tomato paste
6 fluid ounces warm water (110 degrees F/45 degrees C)
2 tablespoons honey
3/4 teaspoon onion powder
3/4 teaspoon garlic powder
1/4 teaspoon dried oregano
1/4 teaspoon dried marjoram
1/4 teaspoon dried basil
1/4 teaspoon ground black pepper
1/8 teaspoon cayenne pepper
1/8 teaspoon dried red pepper flakes
salt to taste
Mix everything together in a medium sized bowl and allow to sit for 30 minutes to allow the flavors to blend.
Once my dough was done rising on the pizza pan, I topped with the deliciously delicious sauce. I then added a TON of mozzerella cheese. I had raided my fridge earlier and had one left over chicken breast from my fried chicken I had made the night before. I chopped it up and put it on top of the mozzerella cheese. I then chopped up two green onions and some black olives and put them over the chicken.
To give it a little more of a...cheesy flavor, I shredded some monterey jack and some sharp cheddar. I popped it in the oven at 350 degrees for 25 minutes and it was beautiful!
I served with salsa, sour cream, and sliced avocado. My husband has already asked for this again and between him and my brother-in-law there was only one piece of pizza left!
This was so easy to put together and I had all of the ingredients already in my pantry. I will be making this again soon!
Liz
**OK...I took some pictures of this but...they didn't turn out so well! It looked sooo good but it was dark out and my pictures looked very unappetizing...so I won't be putting them up. Next time! :)
Saturday, September 4, 2010
Omelets!
Breakfast this morning? Ham, sharp cheddar, monteray jack, and green onion omelets!
This weekend we have my youngest brother-in-law staying with us, and while he's here he is going to help the hubby with a building project. I thought I'd make a hearty omelette for each of them to start them off.
I taught myself how to make an omelet a few months ago, and, in the event that there are others who don't know how I'll put it here!
Normally I use two eggs but the fact that these guys were hungry had me grabbing for three.
Omelets
3 eggs
2 T milk
salt and pepper, to taste
1/4 C. chopped ham
1/4 C. shredded sharp cheddar cheese
1/4 C. shredded monteray jack cheese
2 T. chopped green onion
1 T. vegetable oil
Scramble eggs in a bowl with milk, salt and pepper. Heat oil in your skillet over medium heat. Once hot, pour eggs into the skillet. As the eggs cook, push the cooked egg slowly towards the middle of the skillet,* letting the uncooked egg drain to the outside. Once the egg is no longer runny, add your cheese, green onion and ham to half of the egg. Fold in half and place on a plate and enjoy!
*I have found that using a rubber spatula works the best for this.
Obviously, you can use any fillings you want in your omelet. My hubby loves mushroom, bacon, and green bell pepper in his sometimes :)
Friday, September 3, 2010
Lemon Cream Cupcakes!
Today, I had the urge to bake. Now, you must understand. This urge doesn't come very often. Don't get me wrong, I like to bake. But cooking is more of my thing. Maybe it has something to do with too much baking as a young teen? Who knows. But for whatever reason, I don't bake often.
I poked around online for a while, trying to find something that didn't use cocoa powder (I'm all out! :( ). I asked some friends and got a very quick 'Cupcakes!' in response. Cupcakes!
I don't think I've made cupcakes since last Thanksgiving...when I baked and frosted about four dozen to take to a party...and I think only three got eaten. Hey, its hard to compete with a pumpkin cheesecake on Thanksgiving.
So I scoured my ever-handy and favorite Allrecipes and found this!
I'm a sucker for lemon.
I pretty much followed the recipe but for the lemon rind as I don't have any. I also halved the recipe...there are only two adults and a toddler here...there's no call for 30 cupcakes! :)
They came together so beautifully and quickly. The batter was so nice and thick. The sour cream is such a nice touch.
Lemon Cream Cupcakes from Allrecipes.com
(recipe and photos by literarymiss. Original recipe from allrecipes.com)
1/2 C. butter, softened
1 C. sugar
2 eggs
1/2 t. vanilla extract
1 3/4 C. all-purpose flour
1/2 t. baking soda
1/4 t. baking powder
1/4 t. salt
1 C. sour cream
Cream together butter and sugar. Beat in eggs and vanilla; mix well. Combine dry ingredients in a bowl and add to butter mixture alternately with the sour cream. (Batter will be thick). Fill greased or paper-lined muffin cups with 1/4 cup of the batter. Bake at 350 degrees for 25-30 minutes or until a toothpick inserted near the center comes out clean. Cool for 10 minutes then move to wire rack to cool completely before frosting.
Lemon Cream Frosting
1 1/2 T butter, softened
1 C. + 2 T. powdered sugar
1 T. lemon juice
1/4 t. vanilla extract
1 1/2 t. milk
Cream together butter and sugar in a small mixing bowl. Add lemon juice, vanilla and milk. Beat until smooth. Frost cupcakes.
**ok. I made these following the above recipe. The cupcakes are wonderful! But I will never use this frosting again. It was way too runny and I had to add way too much powdered sugar to make it thick enough to frost. It ended up way to sweet and I ended up scraping it off! Buttercream Frosting next time with some lemon extract!
Liz
I poked around online for a while, trying to find something that didn't use cocoa powder (I'm all out! :( ). I asked some friends and got a very quick 'Cupcakes!' in response. Cupcakes!
I don't think I've made cupcakes since last Thanksgiving...when I baked and frosted about four dozen to take to a party...and I think only three got eaten. Hey, its hard to compete with a pumpkin cheesecake on Thanksgiving.
So I scoured my ever-handy and favorite Allrecipes and found this!
I'm a sucker for lemon.
I pretty much followed the recipe but for the lemon rind as I don't have any. I also halved the recipe...there are only two adults and a toddler here...there's no call for 30 cupcakes! :)
They came together so beautifully and quickly. The batter was so nice and thick. The sour cream is such a nice touch.
Lemon Cream Cupcakes from Allrecipes.com
(recipe and photos by literarymiss. Original recipe from allrecipes.com)
1/2 C. butter, softened
1 C. sugar
2 eggs
1/2 t. vanilla extract
1 3/4 C. all-purpose flour
1/2 t. baking soda
1/4 t. baking powder
1/4 t. salt
1 C. sour cream
Cream together butter and sugar. Beat in eggs and vanilla; mix well. Combine dry ingredients in a bowl and add to butter mixture alternately with the sour cream. (Batter will be thick). Fill greased or paper-lined muffin cups with 1/4 cup of the batter. Bake at 350 degrees for 25-30 minutes or until a toothpick inserted near the center comes out clean. Cool for 10 minutes then move to wire rack to cool completely before frosting.
Lemon Cream Frosting
1 1/2 T butter, softened
1 C. + 2 T. powdered sugar
1 T. lemon juice
1/4 t. vanilla extract
1 1/2 t. milk
Cream together butter and sugar in a small mixing bowl. Add lemon juice, vanilla and milk. Beat until smooth. Frost cupcakes.
**ok. I made these following the above recipe. The cupcakes are wonderful! But I will never use this frosting again. It was way too runny and I had to add way too much powdered sugar to make it thick enough to frost. It ended up way to sweet and I ended up scraping it off! Buttercream Frosting next time with some lemon extract!
Liz
Thursday, September 2, 2010
Sloppy Joe!
I was sitting down with my notebook the other day trying to think of something to cook that was 'new'. Something that we don't have all the time. The answer? Sloppy joes!
I'm slightly ashamed to admit that I've never made homemade jos before. This seemed like the ideal time. I used a recipe off of the ever wonderful Allrecipes. I made only two slight variations.
To make it a little healthier I used a pound of ground turkey with a pound of ground beef. (I'm not gonna tell the hubby! If he can't tell he doesn't need to know! :) ) I also added a little BBQ sauce just for a different flavor. As I type this its simmering in my crockpot on the counter and smells wonderful.
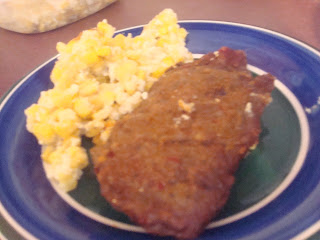
Sloppy Joes II (from Allrecipes.com. Variations by me)
1 lb ground beef
1 lb ground turkey
1/2 c chopped onion
1/2 c chopped green bell pepper
1/4 c brown sugar
1/4 c bbq sauce
1 t. garlic powder
salt and pepper to taste
Put everything in the crock pot. Cook on high for 4 hours and enjoy!
*The original recipe doesn't call for a crock pot but I enjoy using mine every chance I can get!
Tuesday, August 31, 2010
The joys of meal planning
Now that I've decided what this blog will be, I'm bursting with ideas that want to be written. As tomorrow is Pay Day (which means that its also grocery shopping day!) I'll post about that. Grocery shopping...not Pay Day.
I'm not your average girl. I'm not a big shopper. The mall? Sure, I'll go. But I like to look then leave. I'm not a hang out all day and shop for hours kinda gal. Not in the least. Never have been!
But when it comes to grocery shopping...ahhh. That, I love. LOVE. I spend two weeks coming up with my grocery list for the next two weeks. I love meal planning and finding good deals. Most importantly, I love the results.
If you don't meal plan, you don't know what your missing. Not that it's a particularly fun thing to do(alright alright. I love it)...But it is very rewarding.
If you go to the store with a list in hand you'd be amazed at,not only how much less food you buy, but also in how much less you spend.
When I sit down with my notebook, pen, cookbooks and the ever wonderful Allrecipes I am able to decide what types of meals I want and how to re-use ingredients.
How many times have you bought...say, a bag of carrots. You need some carrots for some soup. Then, three weeks later, said bag of carrots is still sitting in your veggie drawer slowly becoming soggy? Yeah. I do it too. But when you meal plan, you can find more than one meal that uses carrots. Or any other ingredient.
Perhaps I'm beating a dead horse here. But if you don't do it...give it a try!
Liz
A New Look and a New Purpose
I had to revamp. Why? Because I have finally decided to make this undecided blog decided, that's why! I've decided to make this my 'official' cooking blog. I had a few cooking posts scattered here and there but now thats pretty much all there will be, and I'm excited!
Today I also have signed up to become a Daring Baker and a Daring Cook! I'm so excited I can hardly stand it. The Daring Kitchen is a website where they host monthly challenges to cooks and bakers alike. At the end of the month, you can post your results and pictures on your blog, and on the website! I wish I had seen this site years ago!
I'm already telling my friends about the site and hoping that some of them join!
And now, I'll sign off here for I need to figure out what to make for dinner...Pierogis? Perhaps!
Happy Cooking!
Flat Iron Steak
I've never made flat iron steak before. Heck, I'd never even heard of it before I was perusing the cuts of meat that were on sale! But I thought I'd give it a try.
I found a recipe for a rub online at Allrecipes and with a (very) little tweaking I used what I had here at home and made me some steak!
This is, not only my first time making a flat iron steak, its also the first time I've ever made or even used a rub!
I read somewhere online that wrapping the steaks in plastic wrap is the best way for to marinate with a rub so I proceded to do that then stuck them in the fridge for four hours before cooking.
Here is my slightly altered version of the recipe:
Three Pepper Rub for Flat Iron Steak.
2 T. paprika
3 t. salt
3 t. brown sugar
1 T. chili powder
1 t. red pepper flakes
1 t. ground black pepper
1 t. garlic powder
1 t. onion powder
1 1/2 t. ground cumin
Mix everything together and rub onto steaks!
** This covered 4 small steaks with a little left over.
Labels:
allrecipes.com,
flat iron steak,
food,
Three Pepper Rub
Monday, August 30, 2010
Chicken Tacos
As it is so close to payday, the supplies in my kitchen are running slightly low. It happens. I had two chicken breasts left and I wanted to use them, but really didn't feel like cooking a big meal. Since I wasn't feeling fried or baked, I decided to go with...Chicken Tacos!
It was super easy...First I chopped the thawed chicken into small, bite size pieces. Next I just tossed it into the pan with some olive oil, cumin, chili powder, red pepper flakes and some salt and pepper to taste.
My recipe called for a cup of lemonade, but I just used some organic lemon juice and water over the chicken and let it simmer. Once the liquid cooked down I was left with some delicious slightly spicy, slightly lemon-y tasting chicken.
Combined with some heated soft shells, cheese, salsa and home-made guacamole and topped with sour cream, these were a hit! My husband loved them and I wish I had had room for more than one!
I will definitely be making these again...with the addition of lime juice to the lemon juice...I think it will give it a good kick!
Friday, July 16, 2010
Cabbage Soup!
I've read about it. It sounded disgusting. Revolting. Something farmers used to eat when there was no meat left, and they were damn near starving. Yucky.
BUT! I've just finished a bowl of home-made 'Cabbage Fat-Burning Soup' and its DELICIOUS!
I found the recipe online in my never-ending search for recipes. The fact that the words 'fat-burning' were in the title guaranteed it a look. Both my hubby and I are trying to lose weight, and since the recipe seemed fairly simple, I thought I'd give it a try. What did I have to lose?
Well, I love veggies, so I figured I would like it, as long as it didn't taste too bland. But with a tomato juice and beef broth base, could it be bland? Well, it tastes delicious. Just sayin'.
Picture to follow.
Cheers!
Wednesday, July 14, 2010
Okonomiyaki
This, my friends, was my first venture into Japanese food. And it was a success!
Okonomiyaki basically means 'whatever you want'. Its like a pancake, that you put, well, whatever you want in. Its 'base', if you will, is cabbage, sliced very thinly, to which you add a little flour, some eggs, chopped green onion and some water. You then mix it all together and then add your meat, if you want it.
We used shrimp (my favorite!) and bacon. But instead of chopping it up and mixing it in the batter, we pressed it into the top of the pancake after scooping the batter into the pan.
Its topped with some sort of...sweet brown sauce that I don't know the name of, and some Japanese mayonaise, then some ginger.
I was so surprised at the outcome of this! I mean, a cabbage based pancake? Really? YES! It was so delicious! I can't wait to learn some more Japanese recipes!
Friday, April 2, 2010
My foray into Japanese Food!
I believe I mentioned once that I have a friend who doesn't know how to bake, and that I was teaching her to bake, and that she, in turn, would teach me how to make Japanese food. Well, a little while back, we went over to her house, and she taught me how to make 'okonomiyaki', which means pretty much 'put whatever you want together and grill it'. At least, that is my understanding. :)
We started by shredding (I can't really call it chopping...it was the tiniest I've ever had to chop anything. Ever.) some cabbage, then chopping some green onion. To this, we added egg, flour, and water, enough to make a pancake like batter, which we then fried on a skillet. Once the batter had been poured onto the hot pan, we pressed shrimp that had been salted and peppered into the top. You can also chop the shrimp (or beef, bacon, pork, chicken...you get the idea) and add it to the batter, if you'd like.
Once the pancake was done, we squirted some Japanese mayo and some other sauce that I can't remember the name of for the life of me on top, sprinkled some ginger, bonito flakes, and some green onion on top, and enjoyed!
It was so easy! Whenever you look at pictures of ethnic food, (ok, so whenever I look at pictures of ethnic food) it always looks so complicated, which usually deters me from trying to make it. Obviously not a good thing! I'll be making okonomiyaki again, for sure. And trying it many different ways, including many different ingredients!
Sunday, March 14, 2010
Cast iron and chicken nuggets.
There's something wonderful about a cast iron skillet. No joke! If you don't use one, you have no idea what you're missing. Today, I broke mine in.
Lunch was swift approaching, and I knew I had to make something, otherwise we'd end up eating leftover lasagna. Again. (Ok, ok, so I shouldn't have made such a big pan. I've learned my lesson.) So, I took out the chicken I had defrosted yesterday and stared at it in deep contemplation. Chicken nuggets! Aha!
Not only was I going to make chicken nuggets, I was going to make parmesan chicken nuggets. And not only were they going to be Parmesan chicken nuggets, they were going to be cooked on my new cast iron skillet.
It was so easy it is almost insane. All you do is take an egg, beat it up, dip the chicken in it, then dip the chicken in a mix of seasoned breadcrumbs (I used Italian) mixed with parmesan cheese and dried basil. Fry on skillet of choice, in some butter and oil, and BAM. You have lunch. Delicious lunch.
It really was tasty. And, for those wondering, parmesan cheese makes such a lovely crispy crust on anything you dip it in. My son is gobbling them down as I type. This is definitely a keeper.
Tuesday, February 16, 2010
The Case of the Exploding Casserole.
Yesterday was a day like many others. And so, last night was a night like many others. I read. He played video games. I wrote. He played video games. I cooked. He played games. :) I made a delicious Sheppard's Pie, something I hadn't made in a long time. So, I took the time to prepare it, and all that fun stuff.
When it was done cooking, I took it out of the oven, and set it on the stove top, and got ready to eat. It tasted great, and once I put away the leftovers, I didn't do the dishes right away, so the casserole pan was left sitting on the stove top.
A while later, I decided that I wanted some tea. Some nice, warm tea. So, I turned on the back burner, and went to fold the laundry. Right away, I could hear the sound of what I thought was the water heating up. T'wasn't so.
I accidentally turned on the front burner. Where the casserole sat. Of course, I freaked out a small bit, put on an oven mitt and put it in the sink. I thought it would be fine, because there wasn't any water in it. Not so.
It was literally less than 5 seconds, before there was a loud BANG, and glass went flying everywhere. And I mean everywhere.
Needless to say, I was quite scared. I'll admit it. I very nearly cried, it scared me so bad. And, naturally, I am now casserole-less.
So, that was my big(or not so big...more of a loud) adventure of the night. Hopefully one that won't repeat.
*Note to self: Rapid temperature change on glass objects is likely to result in explosion*
Sunday, February 7, 2010
Concerning leftover mashed potatoes.
I now know what to do with those pesky potatoes! Woo hoo.
Ok, so, you take 2 cups of cold mashed tators, some Italian seasoning, salt, pepper, an egg, and a bunch of parmesan cheese, mix together, and roll into a ball. Then coat the ball in a mixture of flour and more parmesan cheese, press into hot, wellwellwell greased pan, and fry. Yumminess.
They are divine. :D
Monday, February 1, 2010
The Apple of my Pie
Last night, for the first time in my life, I made an apple pie. A very tasty apple pie. However, I learned a few things in the process.
First of all, I now understand why housewives of old would bake pies, etc. in the morning. It just takes too long. But, I suppose on our part, starting at 8 pm was not so smart. We mixed up the pie crust recipe (we wanted to do everything from scratch), and got to work. Now, I have made pie crusts before, and this recipe was fairly easy. So, I did that part successfully...I even managed to roll it up on the rolling pin the right way!
This process, the crust, took my friend and I...ok, so I don't really know how long it took us. But I know it took us longer than it should have. However, it was my friends first time baking a pie, ever. So, no worries.
I learned something new when we moved to the filling. After slicing, coring, and peeling the apples, we set them in a bowl of salt water to prevent them from yellowing. I had never heard of that little trick before! I was impressed...:)
The apples took us a good bit of time as well. Like I said, old fashioned way. We used a slicer/corer (which, btw, it is possible to cut a finger with one of these...) and knives to peel them, no peelers for us!
Once we moved to the filling, it was faster. We melted butter, flour, sugar(brown and white) and some water together on the stove, poured over the apples, and into the oven they went!
By this time, the house smelled great, but our hubby's were tired. It was 11pm when they went in the oven. Like I said, I know why they used to bake in the mornings. But, we were excited, and an hour later when we pulled them out, they were beautiful...(pictures to follow) but too hot to eat, at midnight. So, they would have to wait til today.
Overall, it was a good experience...next time, it shouldn't take us 3 hours. I hope. Our next venture is going to be Lemon Meringue Pie...happy baking!
Subscribe to:
Posts (Atom)